Miniature Airbrush Painting Guide – Everything About Airbrush for Models
Disclosure: There are some affiliate links below and I may receive commissions for purchases made through links in this post, at now additional cost for you.
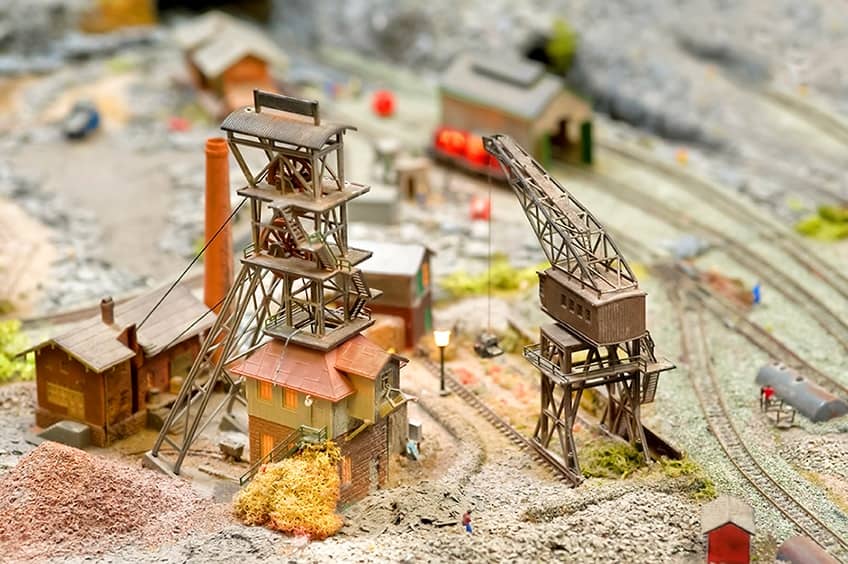
Those who dedicate themselves to the hobby of model making need to give their miniatures a realistic look. Painting this is particularly easy with a miniature airbrush pistol. This technique can be learned quite quickly and can produce masterly works of art after only a few attempts. Large quantities of model vehicles, figures, or miniature buildings can be painted in a very short time. When you airbrush miniatures, patterns, accents, and subtle color transitions are easy to apply. In this article, we would like to give you an overview of what you need for airbrushing in model making and which tricks you can use to achieve an optimal result.
Using an Airbrush for Model Making
In order to create a really realistic model, you need a color scheme in model making that looks as real as possible. Amazing effects can be achieved with the airbrush technique. Of course, perfect works of art are not always possible straight away. After some exercises on paper, however, you will quickly achieve success.
Advantages of using the airbrush technique in model making:
Pros
- Uniform application of paint
- No brush strips
- Finest color gradients possible
- Small parts, as well as corners and edges, are easy to work with
- Very thin paint layers are possible
- The high strength of the ink application
- Very large selection of basic and effect colors
- Unlimited possibilities of color gradients and effect designs
- No fumes/odors if water-based paint is used
Cons
- Can be expensive to get started
- Careful and time-consuming cleaning of the airbrush gun after each use is necessary
- Certain primers can be aggressive and make the surface of your model unusable
- Primers have a filling effect, that can cause some very fine details of the model disappear

Materials Required for Airbrush Model Making
To start airbrushing, you will need some equipment. This includes the airbrush gun, the compressor as a compressed air source, and the paints.
Airbrush Compressor or Another Compressed Air Source
Usually, an airbrush gun is operated by means of a compressor. There are special airbrush compressors for this purpose, which are equipped with an air pressure regulator, manometer, water separator, and sometimes also with an air tank. Airbrush compressors work particularly quietly and are often compact and relatively light.
Some model builders use a compressed air bottle to operate their airbrush gun. This is possible, but from a financial point of view, it is not recommended. The bottles are quite expensive and will quickly empty. The purchase of a compressor will pay itself off here after painting your third model.
CO2 cylinders are NOT an option for the operation of an airbrush gun. Carbon dioxide displaces oxygen in the lungs and is heavier than air. So it collects near the ground and is a real danger for children, pets and the artist. Ventilation of the workshop is of limited help here!
Which Airbrush Gun is Best for Model Making?
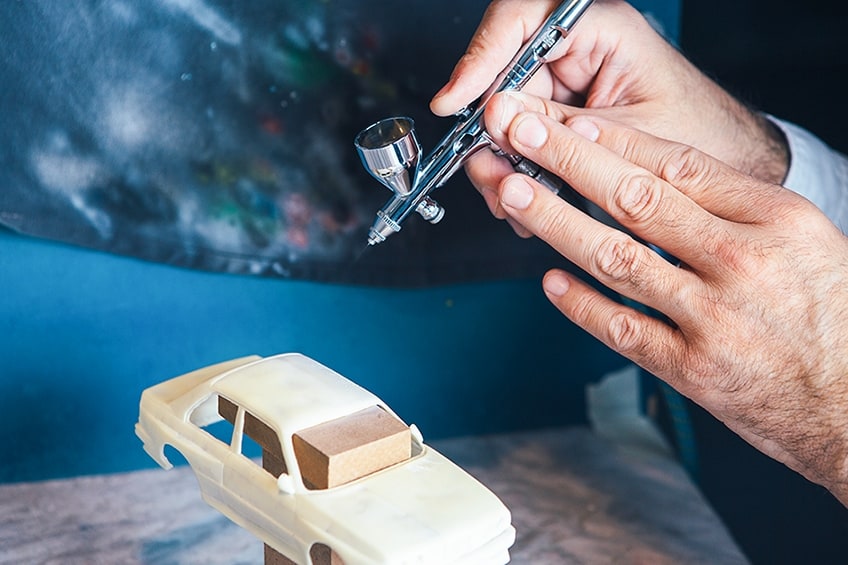
The basic principle of all airbrush guns is the same. Inside the gun, a stream of air carries paint with it. The atomized paint passes through the nozzle to the outside. What differs is the placement of the paint cup, and the possibilities of regulating the air and paint volume.
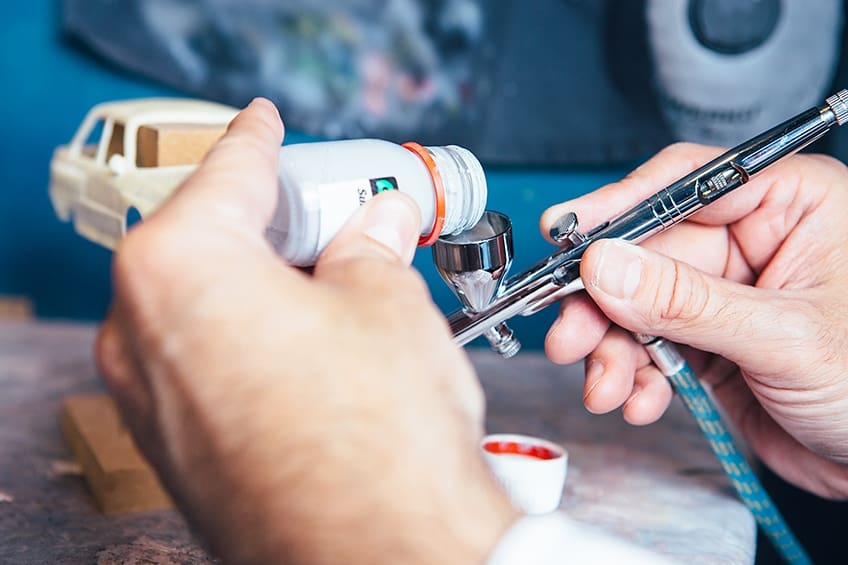
The paint cup can sit on the gun. This type is called a flow cup system. Thanks to gravity, the paint flows into the air stream and is swirled there. The flow cup system is often associated with the Double Action System described below and in this combination, it is an all-around tool. If the paint cup is placed underneath the gun, it is called a suction cup system. Here, the negative pressure created by the airflow sucks the paint out of the paint cup. This system is particularly suitable for primers due to the larger paint cup.
The regulation of the airflow and the amount of paint is done in double action as well as in single action by a lever that can be operated with one finger. In the double-action version, pressing this lever adjusts the airflow, and pulling it adjusts the amount of paint. The lever is therefore provided with a double function (Double Action).
In the single-action principle, the amount of ink is fixed by means of a rotary wheel. The lever serves only to regulate the airflow. This principle is quite easy to use and quick to learn, but unfortunately also unsuitable for detailed work, fine color gradients, and effects. A single-action suction cup airbrush gun is ideal for primers. With a double-action airbrush with a flow cup system, you create lifelike art with the finest details and realistic effects.
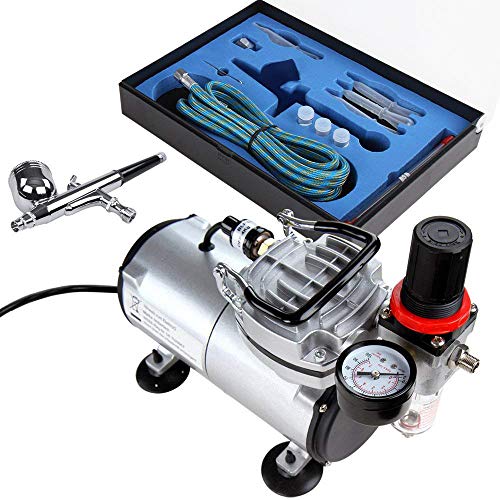
Best Airbrush Gun With Compressor: TIMBERTECH Airbrush Kit
If you need a compressor in addition to the airbrush gun, we recommend the 11-piece airbrush set from Timbertech. For about $90 you will receive a high-quality airbrush gun and a good airbrush compressor. Due to the handy, light, and quiet compressor and the very good spray pattern of the airbrush gun, this airbrush set is particularly suitable for model making.
With the 3 nozzle sizes 0.2 mm, 0.3 mm, and 0.5 mm, already included in the set, primers as well as filigree details can be painted. The oil-free compressor has a manometer, a pressure regulator, and an air filter. It works very quietly and can even be retrofitted with an air tank, which then allows noiseless to work for a longer period of time.
- A fully portable airbrush compressor kit
- Includes everything you need to get started with airbrushing
- A versatile airbrush suitable for fine details
Pros
- Includes many different parts: airbrush pistol, compressor, connection hose, pipettes
- An extremely good price-performance ratio
Compressor:
- Very efficient
- Can be retrofitted with an air tank
- Oil-free and therefore low maintenance
- Handy, light (3,6kg)
- Works very quietly
- Suitable for nozzles between 0.2 and 1.0 mm
- Easy regulation of the compressed air
Airbrush Gun:
- 3 nozzle sizes with matching needles for versatile work
- Packed in a suitable storage and transport box
- Versatile in use
- Great spray patterns
Cons
- The disassembly necessary for cleaning is difficult, and only is only possible with the enclosed tools
- Replacing tools and parts can be a challenge
Airbrush Paints and Primer for Model Making
Almost any water-based acrylic paint is suitable for model airbrushing. This also has the advantage of being odorless and harmless to health. Solvent-based paints can also be used. However, you should make sure that your airbrush gun is suitable for this. Often the seals do not withstand frequent use of such paints. It is also important to wear a breathing mask when working with solvent-based paints.
In addition to the special airbrush for miniatures paint sets with various basic colors, many manufacturers also offer special effect colors for model making. For example, you will find metallic colors, colors for rust, dirt, flaking, and aging effects, camouflage colors for model cars, and color sets for realistic imitation of wood and leather.
Best Basic Set: VALLEJO Basic Colors Airbrush Paint Set
This is the perfect basic set for anyone airbrushing models. This paint set includes 16 different colors, and has been specifically designed for hobby/model painting. This option includes all of the basic acrylic colors that you would need for all kinds of painting, so it is a good option for beginners to invest in. You can use these paints for a wide range of projects.
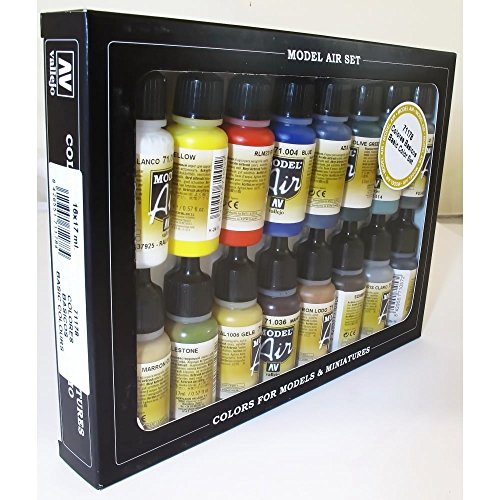
- A set of 16 different acrylic airbrush paints
- Designed for model and hobby use
- A basic set of versatile colors
Pros
- Includes a good range of 16 different paints
- All of the basic colors needed for various projects
- Specially formulated for airbrushing models
- Quality colors and durability
- Versatile water-based acrylic paints
Cons
- The set is quite expensive considering the small paint size
Effects Paint: VALLEJO Colorshift Galaxy Dust Paint
If you love painting space/galaxy themed models then this is an amazing airbrush paint to have. This set of acrylic paints for airbrush model spraying includes six Colorshift paints. These metallic paints offer a variety of different colors depending on the angle you look at them from. These paints offer a vibrant metallic sparkle and are specially formulated for easy airbrush application.

- Metallic acrylic airbrush colors
- Each flake presents a variety of color
- Includes 6 galaxy Colorshift paints
Pros
- A vibrant metallic color set
- The paints offer a unique color shifting effect
- Specially formulated for painting galaxy/space themed models
- The perfect airbrush consistency
- Long lasting colors
Cons
- The set is fairly small
Best Model Primer: VALLEJO White Primer
Vallejo specializes in making paints for model airbrushing, and this primer works well over all kinds of models. The primer is a basic white (although other colors are available), and it adheres well to all kinds of surfaces. This primer has an acrylic-polyurethane formula for good durability and versatility.

- A specially formulated airbrush model primer
- Suitable for plastic, resin, brass, and more
- Comes in a 17ml bottle in white
Pros
- A versatile white primer
- Suitable for a wide range of surfaces
- Provides great color coverage
- Easy to apply with an airbrush
- Works well with most colors and paints
Cons
- Doesn’t mix well with alcohol or solvents
- Only includes a relatively small amount of primer
Airbrushing in Model Making – Step by Step Instructions
In the following airbrush instructions, we assume that you have already familiarized yourself with your airbrush gun. You should also have already gained some experience on paper. Before you start on your model, it is useful to master the basic exercises like circles, dots, and fine lines. You should also know how your spray pattern changes when you change the distance to the surface, move your hand quickly or slowly and vary the amount of paint and/or air.
Prepare the Workplace
- Unfortunately, paint mist does not only adhere to the object to be sprayed but also to everything in the vicinity. Therefore, it is important to free your workplace from everything that you don’t want to be painted. It is best to cover the work surface generously with old newspapers or the like. There are also special spray booths for model making available. These make some of the tedious covering work easier.
- In addition, your model making airbrush workplace should be free of dust and dirt which could settle on the still slightly wet paint.
- Good lighting is of enormous importance for the fine work in model making airbrush painting. With a daylight lamp, you can distinguish really fine color nuances and turn your model into a realistic image. Right-handers place their lighting on the left and left-handers on the right to avoid shadows.
- Get all the tools and equipment ready. Paint pots and solvents should have a firm stand. The airbrush gun should not fall off the table (if in doubt, an airbrush holder will do very well). The compressor should be placed in such a way that its vibrations and noises disturb as little as possible.
- Pay attention to a comfortable sitting position to protect your back.
- Even if you work with water-soluble paint, it is important to ventilate your workshop well. Otherwise, the fine mist of paint could damage your lungs in the long run (similar to the smoke of a cigarette).
- When working with paints containing solvents, a breathing mask, protective gloves, safety goggles and particularly good ventilation of the work area are mandatory!
For model making, there are extraction systems at moderate prices. These small boxes open at the front have a suction device in the rear part and a turning plate in the middle. They protect the environment and your lungs by sucking out the fine paint mist. By placing your model on the rotating plate, you can easily spray it from all sides.
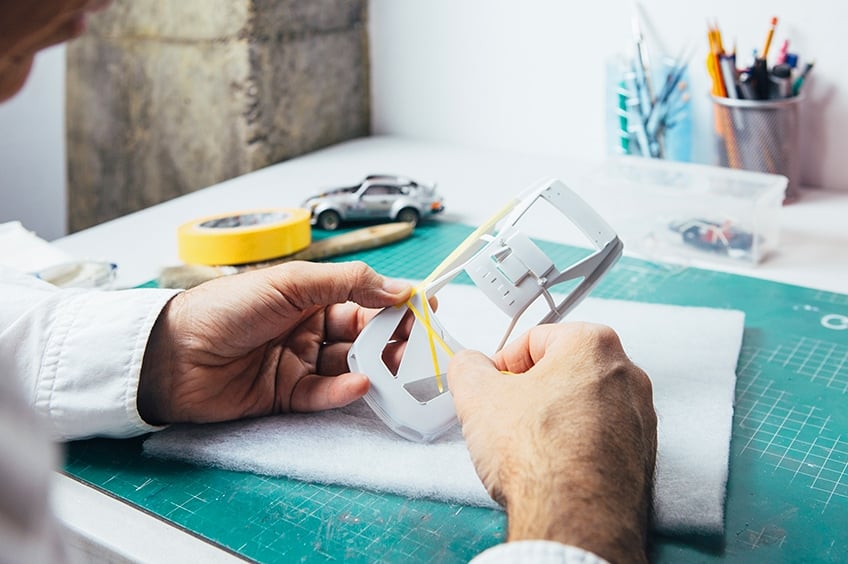
Masking
- When using the airbrush technique in model making, all parts that you are not spraying on should be masked/taped.
- To protect larger areas (approx. 20 cm x 50 cm) you can work with conventional masking film. The film recommended for the hobby area has adhesive crepe tape on one side for fixing.
- For smaller areas to be covered, masking film or a liquid masking film is used. Masking film is a kind of self-adhesive film. The shape of the part to be covered is transferred to the foil, cut out, and glued to the model. Masking film is only suitable for straight surfaces, as it must be firmly attached to the edges, otherwise, the paint will get under the film. Masking foil is carefully removed immediately after spraying. This is the only way to avoid smearing of the paint and frayed edges.
- The liquid masking film protects windscreens, windows, and all other parts of your model that are not completely flat. It is applied relatively thickly with a brush, as soon as it appears transparent it is dry and the airbrush work can begin. Before you remove the masking film layer with tweezers, your airbrush paint should be dry.
Priming of the Model Making Parts
As already mentioned, a primer is not always necessary, but sometimes it is useful. A primer has the following advantages and disadvantages:
Pros
- Primer offers excellent adhesion for acrylic paints on all kind of surfaces
- Primer increase the durability of the paint
- You can get various primer colors that help to enhance the look of the paint
- Primers are available for various different types of paint and surfaces
- They help paint to stick to difficult contours and details
Cons
- Primer paint is relatively aggressive and can eat into the surface. With metals, this property helps to create a good base for the airbrush. With plastic models, on the other hand, this may be a problem, as the surface is too rough.
- The primer layer represents an additional filling, the smallest details of the model can sometimes disappear.
Primers come in white, grey, and black normally. However, they are also available in a wider range of colors if you want something more specific. If you want to apply a primer to make red or yellow shades shine better, it is best to use a white primer. Silver looks best on a black background. For all other colors, it is best to use a primer in the shade grey.
Primer paints are available as universal paints that can be used for many surfaces. A test priming on an inconspicuous spot or on a waste piece is recommended. You can also find special primers in specialist shops, for example for plastic, metal, polystyrene or wood.
Applying the Paint
- You should not make your first attempts on a complex or expensive special model. It is best to practice on old models first.
- In general, injection is carried out at right angles to the model. The paint application should be thin. So try to adjust the amount of paint to a minimum. Start with the corners and edges. Only when these are properly sprayed, the other surfaces can be touched.
- Spraying the model in one go is not a good idea. Unpleasant color noses develop very quickly.
Tips and Tricks for Airbrush Model Painting
Painting of Sets
Sets are best painted directly on the spray branch. You can hold the spray branch in a free place and paint the parts without any problems. If you have some parts that are difficult to hold on to, you can fix them on a piece of tape or double-sided adhesive tape to be able to paint them better.
Drying on a Chemistry Stand
After you have finished your airbrush work, you can hang the model parts on a chemical stand to dry. You can bend a thin wire into simple hooks, which leave only a tiny color-free area that is often hardly visible.
Bulk Parts
If you have painted large pieces, these should be dried off in a cardboard box. This prevents them from being exposed to dust particles which can settle on the wet paint.
Correcting Errors
Airbrush cleaner is usually used to clean the airbrush gun. It dissolves hardened paint. You can also use this property to correct minor defects in your airbrush work.
Cleaning the Airbrush Pistol
After finishing the work, your miniature painting airbrush gun should be disassembled and thoroughly cleaned. When changing the color, it is sufficient to blow the airbrush gun several times with water or airbrush cleaner. Make sure that you remove all water/cleaner from the airbrush gun before filling it with new paint. Spray until only air comes out of the gun.
Painting miniatures and models is a fun hobby, and it is best done with an airbrush. This helps you to achieve the smoothest, most realistic finish. Follow our miniature painting airbrush guide above, and you will be sure to achieve fantastic results with model airbrush painting!