How to Clean Airbrushes – Airbrush Gun Cleaning Guide
Disclosure: There are some affiliate links below and I may receive commissions for purchases made through links in this post, at now additional cost for you.
An airbrush gun is a precision tool that consists of finely tuned components. If you want to enjoy your airbrush gun for a long time you should treat it carefully and clean it regularly. Only in this way will it provide an attractive spray pattern and can be used for a long time for its intended purpose. Cleaning airbrushes is very simple.
How Often Should the Airbrush Gun be Cleaned?
An airbrush gun should be cleaned thoroughly after each use. In any case, it should always be cleaned if a longer break in work is imminent. For thorough cleaning, it is necessary to disassemble the gun into its individual parts and to remove really all paint residues carefully.
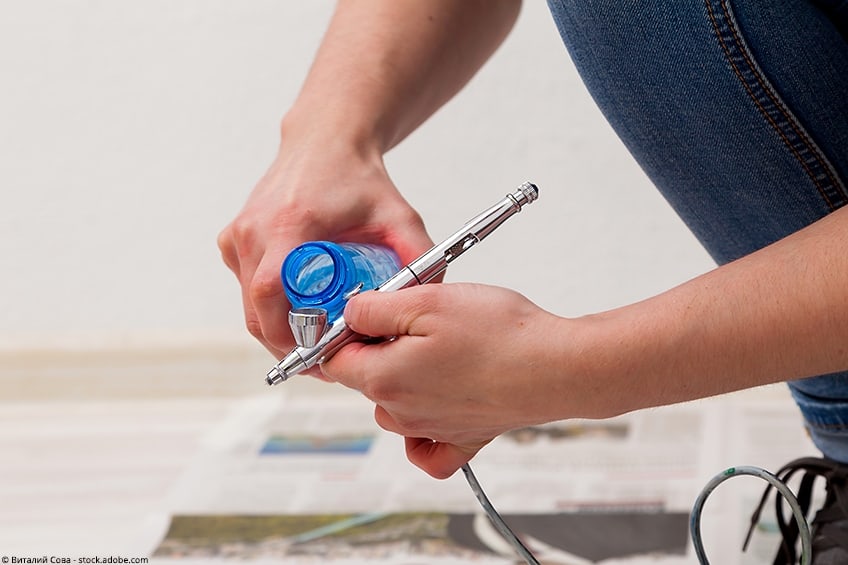
If there is a color change during a work cycle, it is usually sufficient to rinse the airbrush gun briefly with water or cleaner to avoid unwanted color mixtures. Before the new paint is filled in, the water/cleaner should be completely sprayed out, otherwise, the first paint mist of the new paint is too diluted.
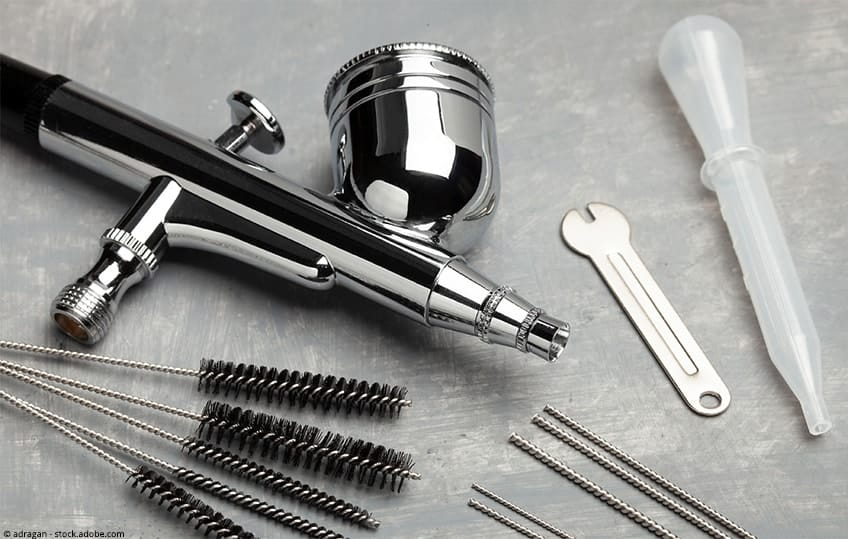
Best Airbrush Cleaning Kit: MASTER AIRBRUSH Cleaning Kit
This full airbrush cleaning kit has everything you need to keep your equipment clean and free from paint. The kit includes various brushes in different sizes, a 5piece mini cleaning needle set, and a 3-in-1 cleaning pot. The versatile set can be used to keep basically all types and sizes of airbrushes clean. As an added bonus, the set includes an Airbrush Resource Center link card to give you access to all kinds of helpful airbrush material. If you own an airbrush, then this is a great set to have around.

- Full cleaning kit with brushes, needles, and a cleaning pot
- The 3 in 1 cleaning pot can be used as an airbrush holder
- A versatile cleaning set for a wide range of airbrushes
- A useful 11 piece airbrush cleaning kit with a variety of different brush and needle sizes
- Includes 5 brushes, 5 cleaning needles, a deluxe airbrush 3 in 1 cleaning pot, and an Airbrush Resource Center link card
- Easily cleans paint in all of the hard to reach areas
- Can be used for basically all airbrushes and brands
- Good value for money
Best Airbrush Cleaner: U.S ART SUPPLY Airbrush Cleaner
For easy cleaning of your airbrush, this cleaning fluid comes highly recommended. The AC water-based airbrush cleaning solution can work with all types of airbrushes and acrylic paints. It can also help to clean airbrushes used with makeup, food colors, tanning solutions, and so on. The formula is environmentally friendly and safe to use.

- AC water-based airbrush cleaning solution
- Works for all airbrushes and applications
- An odorless and environmentally safe formula
- A suitable formula for cleaning all airbrushes
- Can work with airbrushes used for acrylic painting, cake decorating, applying makeup, spray tanning, and so on
- Works effectively with all water-based products
- Non-toxic, odorless, and environmentally safe
How to Clean an Airbrush Gun Properly
The following utensils are necessary for thorough cleaning:
- Airbrush cleaning kit and/or water
- Kitchen roll, cellulose cloth, or old cloth
- Cotton swabs
- Brushes
- Nozzle cleaning needle
- Tools for disassembling the airbrush gun
- Cleaning tool for the ink channel
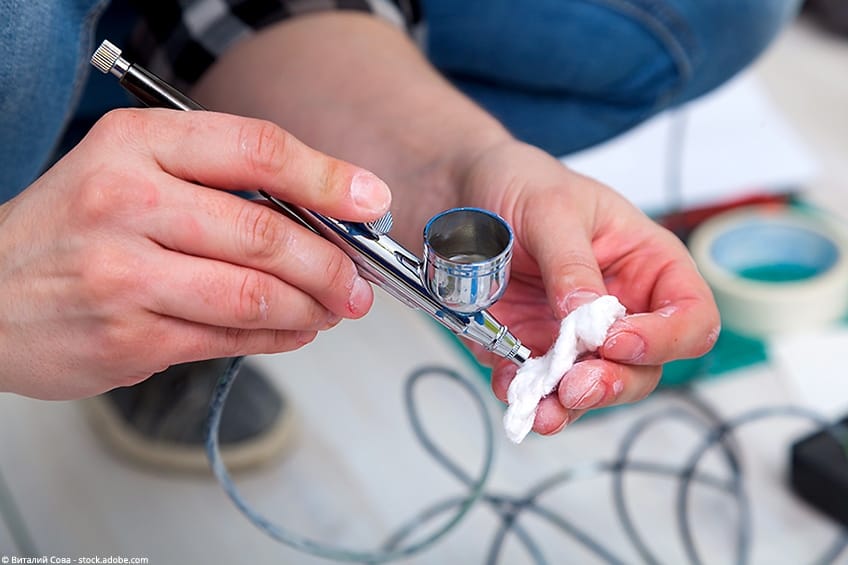
Start by emptying the ink container. The remaining paint, if any, can be easily stored in an empty cup. Now fill some water into the paint cup and remove all paint residue with a cellulose cloth or cotton swabs. You can also use an old brush for this work. This water should be emptied and not sprayed through the gun. When spraying, paint residues that are not completely dissolved could clog the nozzle.
In the clean container you then add a few drops of airbrush cleaner or water. Spray the gun thoroughly with this. It is best to spray on a cloth / kitchen roll to see when no more paint comes out of the airbrush gun.
If you don’t have an airbrush cleaning pot at hand and normal water is not enough to completely dissolve the paint crusts, you can help yourself with a little window cleaner or alcohol. If the spray mist is then free of paint, the remaining water/cleaner is emptied and compressed air is sent through the paint channel until the expelled air is dry.
Clean Airbrush Guns – Step by Step Guide
Cleaning out airbrush guns is a process that involves a few different steps. WHile this can be quite time consuming, it is important to get it done properly to avoid any issues occurring from a poorly cleaned airbrush.
Disassembling the Pistol
Once the ink channel has been blown through and freed of the coarsest ink residues, the individual components are cleaned. Before the first thorough cleaning, you should read the operating instructions of your airbrush gun. There you will find a detailed description of the parts that can be disassembled and the tools that are necessary to do so. If you need tools to disassemble the gun, in most cases they were delivered with your airbrush gun. Some models can also be taken apart without tools.
To avoid losing any of the small parts and seals, it is advisable to collect the individual parts in a bowl. This way you will find them all again later for the assembly.
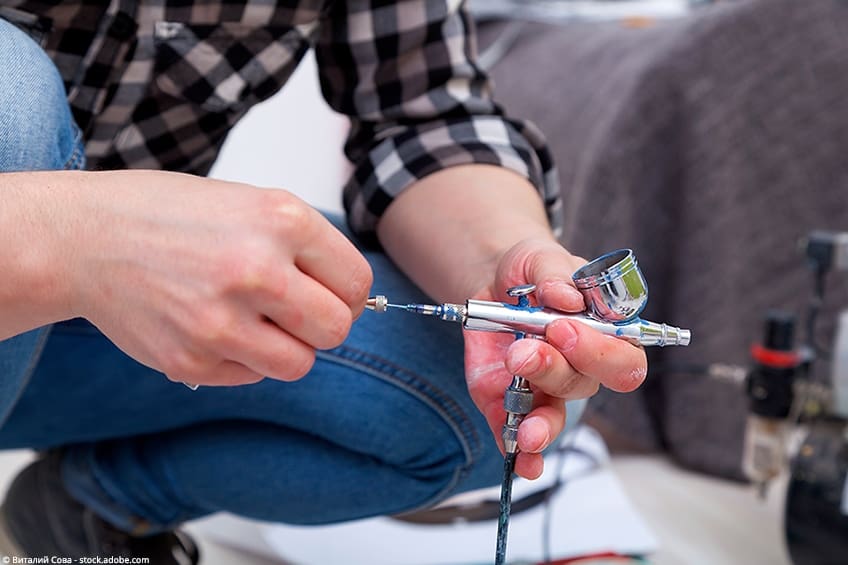
The first thing that is usually done is to remove the needle and put it safely aside. Pull the needle out to the front to avoid unnecessary contamination of the gun interior. Then follow the airhead and nozzle. If the nozzle does not have a plug connection, it must be removed with a special tool. Finally, the paint container, needle chuck, and operating lever are removed.
The individual parts are now carefully cleaned with cleaner and cotton swabs, brush, and cloth. As little pressure as possible should be applied to the fine parts. Metal parts can also be placed in a cleaner to remove stubborn paint crusts.
Cleaning the Needle
To clean the needle, put some cleaner on a cloth, and pull the needle through from the back to the front with a slight twisting motion until all paint residues are removed. Do not clean the needle from front to back. There is a risk of injury for you and the needle!

Cleaning the Airbrush Nozzle
To clean the nozzle thoroughly from the inside, you can use a fine brush or a nozzle cleaning needle. Here absolute caution is necessary to avoid damaging the nozzle.
Ink Duct, Airhead, and Nozzle Connection
The airhead can easily be cleaned of paint with a cotton swab soaked in cleaner. The paint channel can be worked on with a fine brush. For optimal maintenance of the functionality of all seals, they should also be thoroughly cleaned of paint residues.
Pistol Body, Paint Container, and Needle Chuck
The color cup is cleaned with a cloth or cotton swabs. In the rear part of the gun is the needle channel which is cleaned with a brush. The needle chuck does not have to be completely disassembled for cleaning.
Assembling the Airbrush Gun
After the ink reservoir, needle chuck, and operating lever are mounted and installed again, the needle is inserted from the front to the rear. Please never push in from the back to the front: the needle tip could get stuck inside and bend.
Insert the needle until it protrudes out of the needle chuck. If the needle tip is also visible in the paint container, it has been pulled back far enough to place the nozzle. Once the nozzle is in place and tightened, the needle can be pushed forward again until the tip is visible on the nozzle. The pistol body is screwed on last.
Maintenance of the Airbrush Gun
Once the airbrush gun has been disassembled, it is a good idea to take a quick look at the seals and threads during assembly. Checking whether all seals are intact and firmly sealed, as well as checking the fine threads and any set screws should become a fixed part of airbrush cleaning.
After this your airbrush pistol will be in top condition and will give you great use for a long time.
Tips and Tricks for Airbrush Cleaning
Cleaning airbrushes can be an annoying task with all of the small pieces involved. Here are some useful tips to help you get the airbrush properly cleaned with minimal effort.
Cleaning Sets
Special airbrush cleaning kits are available for cleaning the airbrush gun. These contain a cleaning agent optimally matched to the airbrush, a brush set, and usually a small bowl for storing small parts. The components of a cleaning set can also be replaced by commercially available agents. So you can also use a normal window cleaner instead of an expensive cleaner.
The airbrush cleaning brushes can be replaced by dental brushes. Admittedly these are not ideal, because the cleaning brushes are a bit longer, this has its big advantage when cleaning the needle channel. Only they are long enough to clean the canal completely. Dental brushes are often too short.
Solvent as a Cleaning Agent
In general, when using solvents, caution is required. Not every airbrush gun can tolerate this treatment. Even solvent-resistant seals can be damaged in continuous use. The use of acetone is clearly not recommended. Acetone dissolves dried-on paint in no time at all, but also very quickly decomposes the sensitive rubber seals of the airbrush gun. Furthermore, there is a high risk of poisoning when spraying acetone.
Ultrasonic Bath
The individual parts of the airbrush gun can be cleaned in an ultrasonic bath. This often takes only 3 to 5 minutes to loosen all paint encrustations and thus saves a lot of cleaning work. Ultrasonic cleaning reduces the risk of damage to the fine parts.
The correct cleaning of the airbrush gun is absolutely necessary to achieve a beautiful spray pattern each time. Even if it may sound time-consuming and complicated at first, you will see after only a few exercises that the hand movements quickly become routine. The more regularly you clean your spray gun, the less time you have to plan for a cleaning appointment.