Welcome to Airbrush Expert – Your Comprehensive Guide to Airbrushing
On airbrush-expert.com you will find everything you need to know about airbrushing. This includes:
- The best airbrush kits
- The best airbrush guns
- The best cordless paint sprayers
- Airbrush compressors compared and reviewed
- Airbrush paint overview and comparison
- Airbrush spray booths
- Airbrush kits for kids
We also have plenty of inspiring instructions, as well as professional tips and tricks. This includes:
- Airbrushing for beginners
- Airbrush makeup
- Airbrush stencils
- Airbrush model making
- Airbrush cake decorating
- Airbrush spray tanning
- Airbrush nails
- How to paint a bike
Whether you are an advanced artist or a total beginner, we hope you have loads of fun while airbrushing!
How Did Airbrushing Start?
Airbrush art existed in a certain form as early as the stone age. It is assumed that cave paintings were created by a kind of airbrush. The assumption is that juice (colored liquids) was sprayed with the mouth to decorate the walls. At the end of the 19th century, Francis Edgar Stanley developed the first real airbrush gun. It was mainly used in the automotive industry and in model making for painting work. Since the 60’s of the 20th century, the airbrush technique has found its way into almost all artistic fields.
What is an Airbrush?
Airbrush refers to both the equipment used and the style of painting. Thus, the main tool, the airbrush gun, refers to an entire art form.The principle is explained quite simply: a compressor produces compressed air which is led into a spray gun and past liquid paint. In doing this, the air carries the paint drops along. The paint is atomized in the air stream and applied to the painting surface through a nozzle. The painting tool never touches the surface to be painted. The painting is done solely with the fine spray mist. When using the airbrush technique, a fine film of paint is created without brush strokes or stripes.
Why is Airbrushing so Popular?
- Airbrushing has many advantages that other painting techniques cannot offer. With the airbrush technique, for example, you can create extremely fine, infinite color transitions and shades. This allows you to create exceptionally realistic looking paintings.
- In addition, large areas can be quickly covered with paint. The paint is applied particularly thinly and evenly.
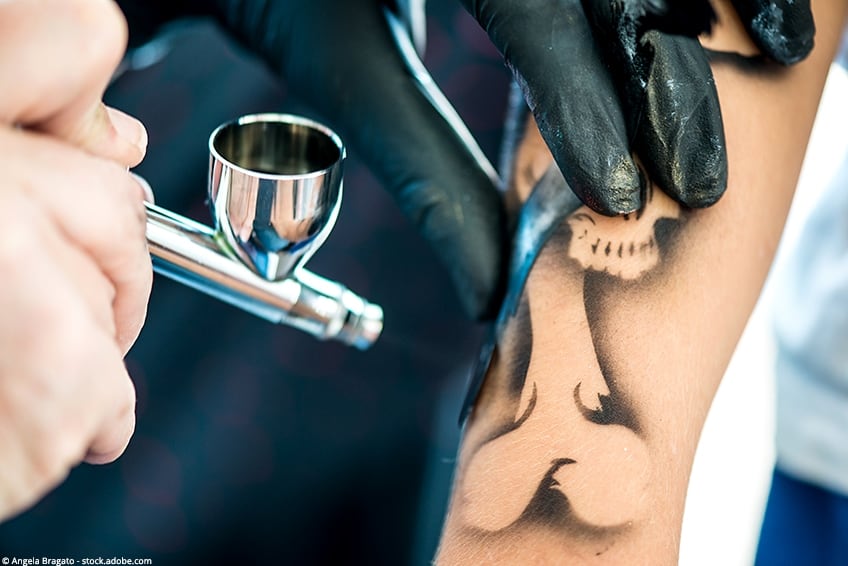
- The airbrush technique can be used on almost all surfaces. From paper, metal, and plastic to textiles, skin, and food - every surface can be decorated with an airbrush. Airbrushes, therefore, can be used in almost all areas of art.
- With an airbrush gun, water and solvent-based paints, as well as varnishes, can be used. Meanwhile, paint manufacturers also create specialized paints for various airbrush uses. Airbrush make-up, food coloring, or special textile colors are also available.
Where is Airbrushing Used
- Automotive industry
- Model making
- Painting
- Body painting, tattoos
- Spray tanning
- Make-up
- Film masks
- Textile industry
- Confectionery for decorating cakes, pastries, and desserts
Equipment and Materials Needed for Getting Started
The basic equipment of an airbrush artist includes:
- An airbrush gun
- An airbrush compressor
- Airbrush paints
- 2K lacquer
- A cleaning kit
If you remain faithful to this hobby you will soon see that there will be a lot more to come. Apart from the different paints and colors you get, with increasing demands on your own work you will also need different nozzle sizes or even different airbrush guns.
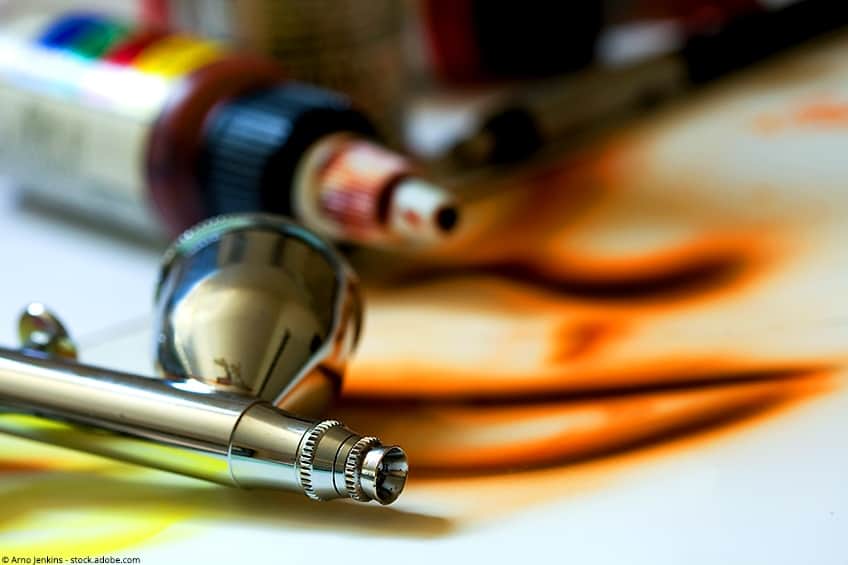
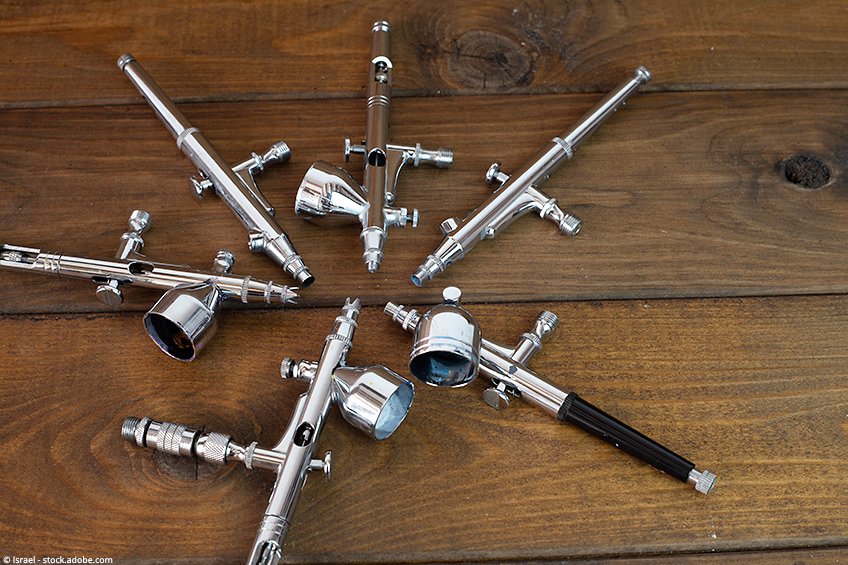
The Airbrush Gun
If you would like to buy your first airbrush gun, you will be confronted with a few terms that need to be understood before you get started. Basically, there are two types of airbrush guns. They work according to the same principle (airflow atomizes paint) but differ slightly in handling:
- In the single-action version, the amount of paint is adjusted and fixed by a wheel. During the spraying process, you can regulate the air pressure and thus the air volume with a lever/knob. This airbrush gun is suitable for simple work.
- The more common variant is a double-action airbrush gun. This also has only one lever, but this one also regulates the air pressure/amount and paint amount. The double-action airbrush gun requires, due to this “double lever function” a little more practice in handling, but is suitable for all imaginable artistic requirements.
A distinction can also be made between the flow cup system and the suction cup system:
- In the flow cup system, also known as a gravity feed airbrush, the paint cup is located on top of the airbrush gun. This allows the paint to flow into the nozzle by gravity. Only a low pressure is required for atomization.
- The suction cup system, also known as a siphon airbrush, requires higher pressure. This is because here the air flows past the paint cup mounted under the gun. This airflow creates suction and thus sucks the paint out of the container. The advantage of this system is the possibility of attaching larger paint cups to the airbrush and thus being able to spray large areas.
The best all-rounder airbrush is probably a double-action airbrush gun with a flow cup system.
When buying the airbrush gun, also make sure that spare parts and accessories are available - such as different nozzles!
Airbrush Compressor
In principle, any compressor that can be regulated in a range between 1.5 and 2.5 bar can be used to operate an airbrush gun. In this respect, an inexpensive or existing DIY store compressor can certainly be used for your first attempts.
Sooner or later, however, the purchase of a specialized airbrush compressor is worthwhile. This has some advantages over the DIY store version in terms of volume and size. In addition, an airbrush compressor has a few things that are missing from the usual DIY compressor. We consider a water separator, pressure regulator, and an air tank to be very useful to ensure trouble-free airbrush work.
Water Separator
The air loses its ability to hold moisture through compression. This escaping water can be expelled with the compressed air in a normal compressor. If water is forced through the airbrush gun with the air stream, unsightly paint blobs appear on the artwork. A compressor designed for airbrushing works against this by having a water separator. In it, the water is collected and kept away from the outflowing compressed air.
Pressure Gauge and Pressure Regulator
When airbrushing, it is necessary to be able to adjust the pressure precisely within a narrow range between 1.5 and 3 bar. For this, you need a pressure regulator and a pressure gauge. The latter shows you exactly the pressure you are using. A nice spray pattern can only be achieved if the pressure can be adjusted in detail.
Air Tank
The advantage of an air tank is clearly the volume reduction and the more constant working pressure. When the compressor is switched on, the air is compressed once and then stored in the air tank. The compressor can then switch off (works silently) and the pressure is taken from the air tank. Only when the pressure in the air tank drops, the compressor motor starts working again and refills the tank. The air tank allows longer working with a more constant pressure in a low-noise environment.
A Summary of Our Compressor Tips:
- A water separator should be provided
- Make sure that the compressor is able to produce a constant pressure permanently
- The volume of the compressor should not exceed 45db
- The compressor should work without oil. This could get into the airbrush gun and lead to blockages of the sensitive nozzle and needle
- The compressor should be low-maintenance (little effort when changing the air filter, lint filter, or oil)
- Especially for use in your own home, you should make sure that the compressor generates as little vibration as possible
Airbrush Paint
In an airbrush, you can use almost all paints. From acrylic, lacquer, and textile paint to food coloring and special make-up colors, everything is possible. Water-based acrylic paints are most suitable for beginners. They cause the least problems, are safer, and easier to use. Acrylic paints are available in a ready-mixed version or to dilute yourself.
If the paint must be thinned, the paint manufacturer usually offers a special thinner. Water-based acrylic paint can also be diluted with distilled water. It is better not to use tap water that contains bacteria. This could make your paint unusable, especially if you want to store it. Distilled water does not have to be bought, if you have a condensation dryer at home you can use this water!
Your paint has the right consistency when it behaves like milk. After you have pulled it up on the edge of a glass with your finger or brush, it runs down and leaves a fine veil of color. Not every paint can be sprayed with every nozzle size. It is therefore important when buying the paint to make sure that it is compatible with the existing nozzle size.
In the end, nozzle size and paint viscosity must also be matched to the result to be achieved. Small nozzle sizes require fine pigments and allow delicate strokes and dots to be drawn. Larger nozzles can be used with coarser pigments and provide a more even base coat.
2K Lacquer
- Acrylic paint dries waterproof but not scratch-resistant. To protect your artwork from scratches you should cover it with a varnish.
- 2K-lacquer (2-component lacquer) is a particularly resistant lacquer, which offers a very robust surface after drying.
- 2K lacquer can be sprayed with most airbrush guns without any problems.
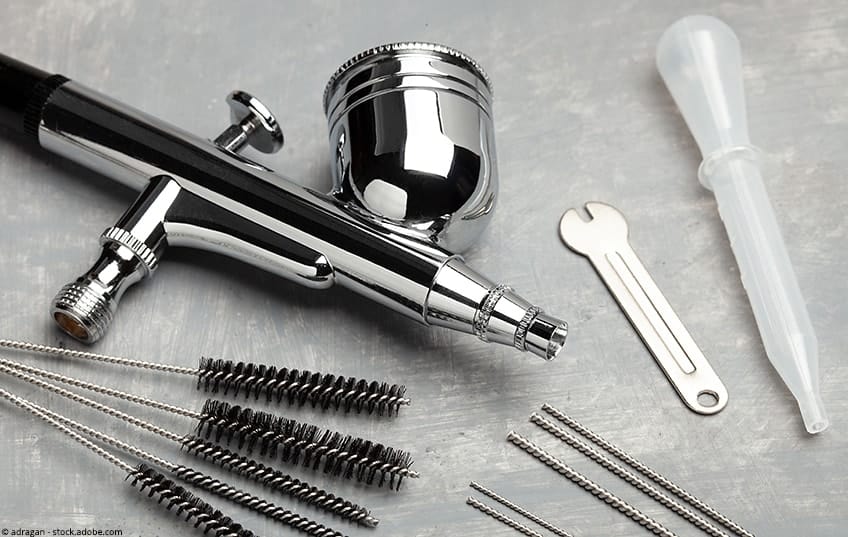
Airbrush Cleaning Kit
The cleaning set contains an airbrush cleaner, brushes, and a cleaning pot. In addition, you should have kitchen roll and cotton swabs ready. A cleaning set is indispensable because even when doing a color change, a short cleaning of the airbrush gun is necessary. This is the only way to avoid unwanted paint mixing and clogging.
After finishing painting, the airbrush gun should always be cleaned thoroughly to avoid blockages. To do this, the airbrush is first blown through with water and coarse paint residues are removed with cotton swabs. Then use the airbrush cleaner which is also put into the airbrush instead of paint and sprayed out. After the airbrush gun has been blown through properly, it is disassembled into its individual parts and cleaned thoroughly so that there are no more paint residues.
Airbrush Sets
Are you unsure which parts can be combined well with each other, or do you not want to invest too much time to assemble the individual parts yourself? Then you can buy a complete airbrush set for every requirement. In most cases, these include a compressor, airbrush gun, and paints. Often a cleaning set is also included. With the purchase of an airbrush set, you not only save time and effort, but often also a lot of money.
When buying an airbrush set, make sure that all the components you need and want are included in the set. For example, many people forget the hose that connects your airbrush gun to the compressor. If no premixed paint is included in the set, you will ideally need a suitable thinner to make the paint sprayable.
An absolute essential component is the cleaning set! You should also have:
- Accessories and useful tools
- Small glass containers
Small sealable glass containers allow you to store mixed and diluted paints for some time. You don't necessarily have to buy these containers in advance, you can also wash out old, empty paint cups and use them for the mixed colors.
Some necessary pieces of equipment for creating perfect airbrush art include the following:
Masking Film:
With masking film, you can make your own stencils. These give you the possibility to spray sharp edges later. With masking film, you can also cover parts of your artwork that should not be sprayed.
Cutter Knife:
You will need this to cut the masking film. Various precision knives and craft cutters are available.
Airbrush Paper:
This consists of a very thick, special cardboard. The masking film can also be easily removed from this special paper. Normal drawing paper is unfortunately all too often destroyed by the foil. Since airbrush paper is relatively expensive, we recommend using normal drawing paper for practice. For your real work of art, you should use it to get an excellent result.
Pencils:
Pancils are needed to sketch your artwork on the painting surface.
Pencils and Brushes:
Pencils and brushes can be used for details that cannot be displayed by an airbrush.
Eraser:
To correct failed details or create light reflections you can use a plasticine eraser.
Extraction Unit:
A suction device is a system that is only open at the front. At the rear, there is the extraction unit with a filter and in the middle, there is a turntable. This allows you to spray your object all around while the fine spray mist is sucked away. On the one hand, this prevents the paint mist from being inhaled and on the other hand, it allows you to work without leaving any traces of spray mist on the object. Extraction systems are especially popular with model makers.
Respirator Mask:
When working with water-based paints and in well-ventilated rooms, a breathing mask is not absolutely necessary but still recommended for the sake of your health. When working with solvent-based paints, however, breathing protection is an absolute must!
Airbrush Holder:
This is used for the safe storage of the airbrush gun. It prevents your tools from rolling off the table unintentionally and possibly getting damaged.
The First Steps for Starting Airbrushing
Interested in getting started with airbrushing? Great! This is a rewarding and fun hobby. Here are some of the first processes to follow when you get started.
Purchasing the Airbrush Equipment
Whether you have decided to buy a single item or an airbrush set, as soon as you have your basic equipment in your hands you can get started with your airbrush art.
Once you have your equipment sorted, its time to start painting. Here are some steps to take for getting started:
- Protect your workplace with a large newspaper or a surface that can get dirty.
- Have a few sheets of normal printer paper ready.
- Prepare a color. Either it is already mixed or you can dilute it with a thinner and/or distilled water until it has the consistency of milk (runs down the edge of the glass and leaves a thin film of paint).
- Connect the airbrush gun to the compressor with a hose. Then connect the compressor to the electricity. Adjust the compressor to the correct pressure. This depends on the paint used, your airbrush gun, nozzle size, paint viscosity, and the degree of fineness you expect to achieve. Most airbrush guns work with pressures between 1.5 and 3bar. Initially, you will probably have to experiment a little to find the optimal pressure.
- Now fill the prepared paint into the paint cup. Our tip: to prevent leakage, fill the cup only half full!
- Now you can finally start!
- The following sequence should be observed when starting up your airbrush gun:
- Air on - paint on
- For a Double-action pistol, this means: first press the lever (air on) then pull the lever (paint on). By pulling the lever, a needle inside is retracted. In zero position it blocks the nozzle. By pulling the lever back the nozzle is released - the atomized paint comes out.
- When the spraying process is finished, it is the other way round:
- Paint off then air off. This means: first push the lever forward to the zero position (paint off) then release it (air off).
- This sequence must be strictly adhered to in order to avoid unattractive paint splashes, which can be caused by uneven air pressure.
First practice spraying different shapes like circles, dots, or lines. Notice how the spray pattern changes when you:
- Change the distance to the painting surface
- Move your hand faster or slower
- Air pressure and/or ink volume varies
It is quite normal that the edges of your sprayed shapes will not have a clear boundary. If you want to achieve this, you have to work with templates and/or masking film.
The Most Important Airbrush Spray Techniques
Airbrushing can be done in many different ways. Here are some of the most important techniques to know when getting started:
Spraying Even Lines
A steady hand and an even movement are basic requirements for fine lines. The second difficulty is to choose the right amount of paint. Not too much paint should be applied, otherwise, the paint will run on the surface. Work with only a moderate pull on the lever of a double-action pistol. With a single-action pistol, you will probably need several attempts to adjust the amount of paint correctly.
With some airbrush guns, it is possible to remove the needle protection cap. This also creates thin lines. But be careful: the sensitive needle is exposed when using this method. If the needle is damaged by an impact or if the airbrush gun is dropped, it must be replaced, which is often quite expensive.
Spraying Even Surfaces
Filling an area with a single color does not sound difficult at first. However, irreversible stains can quickly develop if the gun is incorrectly guided. The best method is to treat the area with serpentine lines from top left to bottom right. Do this until the area is completely filled and the color has reached the desired saturation.
Light and Shadow
Dark colors or black produce shadows. For only a slight shade, you can dilute the dark color with some water as long as it is water-based. This way the shadow will not be too strong. Light reflections are created by white, which you can use as an accent. Another method is to apply the paint on a white background, so the white of the background shines through the paint and creates light effects. It is also possible to remove paint with an eraser and thus create light reflections.
Masking Film or Stencils
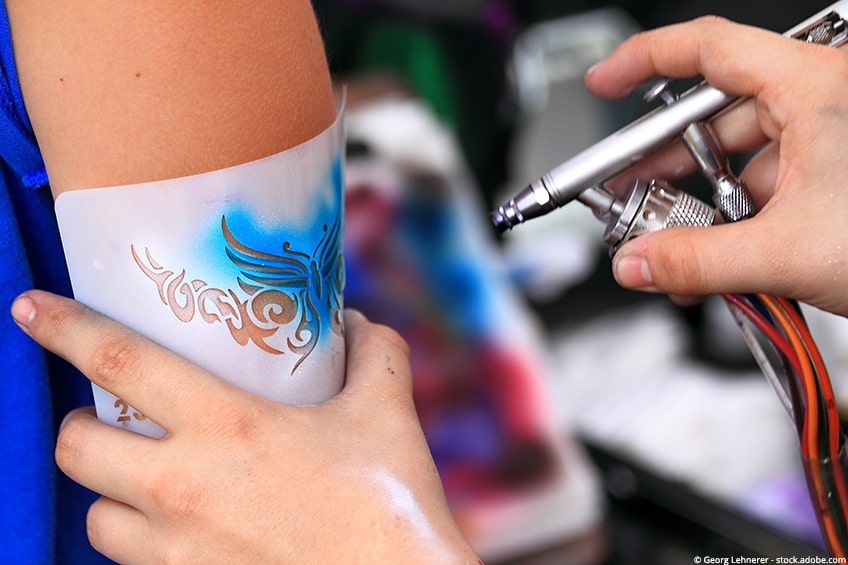
Sharp edges can only be obtained in airbrushing with the use of masking film or templates. Stencils are a good choice and are easily available. Stencils can depict a complete design (design stencil). So you can easily airbrush a prefabricated design onto the painting surface. The advantage is the reproducibility of the design, and the fact that you don't have to be creative yourself. Such stencils are often used for body and face painting or tattoos. Pattern stencils or contour stencils give you more flexibility for the design of your own Image.
You can also easily make your own templates. You will need masking film, a cutter knife, a pencil, and a cutting mat. Draw your design or shape on the masking film, or alternatively, you can print it out and stick it on. Then cut out the shape with the cutter knife (please put the cutting mat underneath!). The template is now ready. The actual work with a stencil is very easy. The stencil is placed on the painting surface or the masking film is glued on. Then it is sprayed over the stencil.
Always glue stencils well and make sure that they are as close as possible to the surface. This is the only way to prevent the paint from running under the stencil and to obtain clearly defined edges.
Airbrushing for Beginners - Instructions for Your First Airbrush Painting
Our recommendation in advance: use good paper for your artwork. There is special airbrush paper from which masking film and stencils can be easily removed and which offers the best properties for airbrush paints to adhere. To practice the techniques you can also use normal copy paper!
- For your first painting, you should choose a simple design and make a sketch or draw the image with a fine pencil. This way you can make sure that you can concentrate on the brushed image during your first attempts.
- If you want to have clearly defined lines, you have to make a template for the corresponding areas using masking foil. Attach the stencil as firmly as possible to the paper (masking film has an adhesive back for this purpose), so that no paint can run under the stencil and the edges are really sharply defined at the end.
- Spray from light to dark and from large to small areas. That means first you spray the bright large areas of your painting, and only afterward paint the shadows and light reflections.
- Parts of the painting that should not get any color (anymore) are always covered. You can use masking foil or other paper for this purpose.
Your first painting will certainly not yet be a masterpiece... but with a little practice you will quickly achieve a fantastic result!
Take Care of Your Health
If you work with paints containing solvents, you should always wear a respirator mask. This prevents you from inhaling the fine spray mist. Additional protection of your health includes an extraction system. If you often work with solvent-containing paints, it is certainly worth buying such a system. A breathing mask is also advisable for processing all other paints. At the very least, however, your workshop should be well ventilated to protect you from the fine paint mist.
Important Tips and Tricks for Beginners
- Always test the color (spray behavior, shade, consistency) on a sheet of paper before you spray it on your artwork
- Before spraying the model directly, the adhesion of the paint on the material to be sprayed should be tested (use a scrap piece of the material or the casting frame as a test object)
- When using a double-action gun, always make sure that the lever is pushed all the way to the front during pauses in spraying, otherwise, the paint supply would not be correctly interrupted and could lead to unintentional paint leakage.
- The needle should always be pulled forward out of the airbrush gun during cleaning to avoid paint smearing inside the airbrush gun
- A bent needle can cause you to stop spraying lines
- Broken nozzle seals or blocked nozzles cause air to escape from the paint cup
Wearing Fabric Gloves Has Two Decisive Advantages:
- Fingerprints on your object are avoided
- The surface to be processed remains grease-free, so that the ink can adhere optimally
Common First Mistakes When Airbrushing
Colour Runs and the Formation of Noses:
The cause could be a too-small distance to the painting surface. The paint is applied too wet and runs.
Paint Splashes:
Paint splashes are very often caused by irregular pressure conditions in the airbrush gun. This happens especially if you do not follow the sequence air on - paint on - paint off - air off
The Opacity of the Ink Being Too Low:
The distance to the painting surface is too great or your painting surface is highly absorbent (paper, textile), it is also possible that the paint is too thin. Reduce the distance, use a less diluted paint or spray several times until you feel the opacity is sufficient.
Coarse-Grained Paint Application:
The cause of an overly coarse-grained paint application is often due to a pressure that is too low on the compressor, or a paint that is too thick. Experiment with pressure and paint consistency until the problem is solved.
Color Clouds, Dark Spots:
Dark spots can be caused by stagnant spraying or back and forth movements at the same spot. Always make sure that the gun is moved quickly and at the same speed over the painting surface. In addition, your turning point when changing the spraying direction should be outside your object.
Irregular, Interrupted Strokes:
A dirty nozzle or a faulty needle can cause these irregularities. First clean your airbrush gun thoroughly. If the fault is still not corrected, examine the nozzle and needle with a microscope or magnifying glass. If there is a defect, the corresponding part must unfortunately be replaced.
The Paint Does Not Hold and Runs:
This is the case if the painting surface is too smooth or greasy. First clean the painting surface thoroughly. It is best to wear fabric gloves when working to prevent further contamination of the surface. If this does not solve the problem, you should roughen the surface a little bit to ensure the hold of the paint.
The airbrush technique is a fascinating art form. With it you can create realistic paintings on any surface. However, the handling of the airbrush gun also requires some practice. If you are patient and do not give up, you will soon be able to create the most beautiful projects. We wish you a lot of fun with your first attempts and please do not despair while getting started - after some practice airbrushing will be well worth it!